Using Begin AI CLI for Batch Processing
Begin AI Command Line Interface (CLI) can be easily used to Batch Process historical data without the need for any knowledge of
python, follow this guide for details on how to use it 🙂Install the CLI
Before installing Begin AI CLI, make sure you have
python and pip available on your computer, by running the following commands on a terminal:python --version pip --version
The Python version must be equal to or greater than
3.6If either
python or pip are not installed on your machine, install both before proceedingNow, that you have confirmed that
python and pip are available on your computer, let’s install beginai-cli by running the following command on a terminal:pip install beginai-cli
That’s all for this step, now onto processing your historical data
To validate that the CLI is installed on your system, run:
beginai-cli --help
You should see an output similar too:

Installing on Windows
If after running the steps on the previous section you see an error regarding
beginai-cli not being a recognized command, you will have to update your Environment Variables to contain the path for the python scripts installed through pip, here is how:- Open
File Explorerand on theNavigation Barpaste the following path:
C:\Users\{your_username}\AppData\Roaming\Python\
- You should then see something similar too:
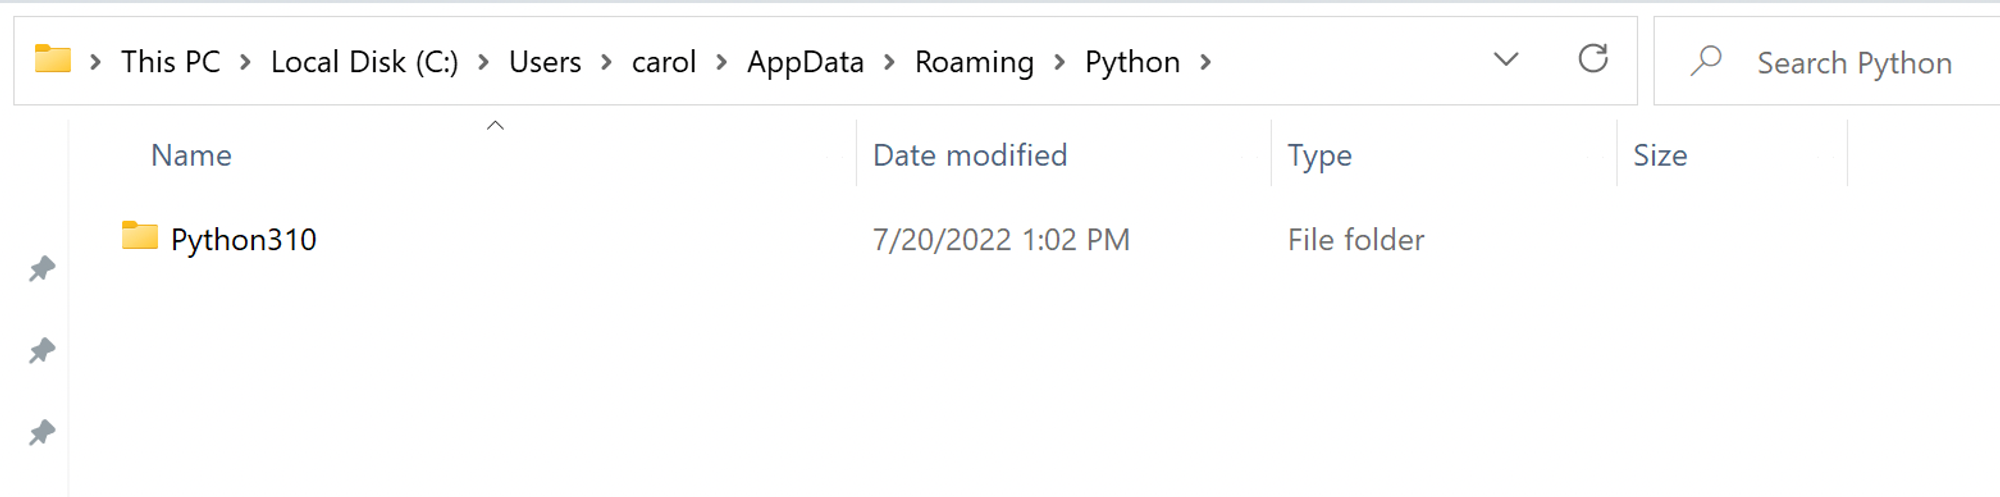
If you see more than one folder available, validate through
python --version which is the current python version being used on your machine- Navigate to the latest
pythonfolder and then to the folderScriptsyou should see something like:
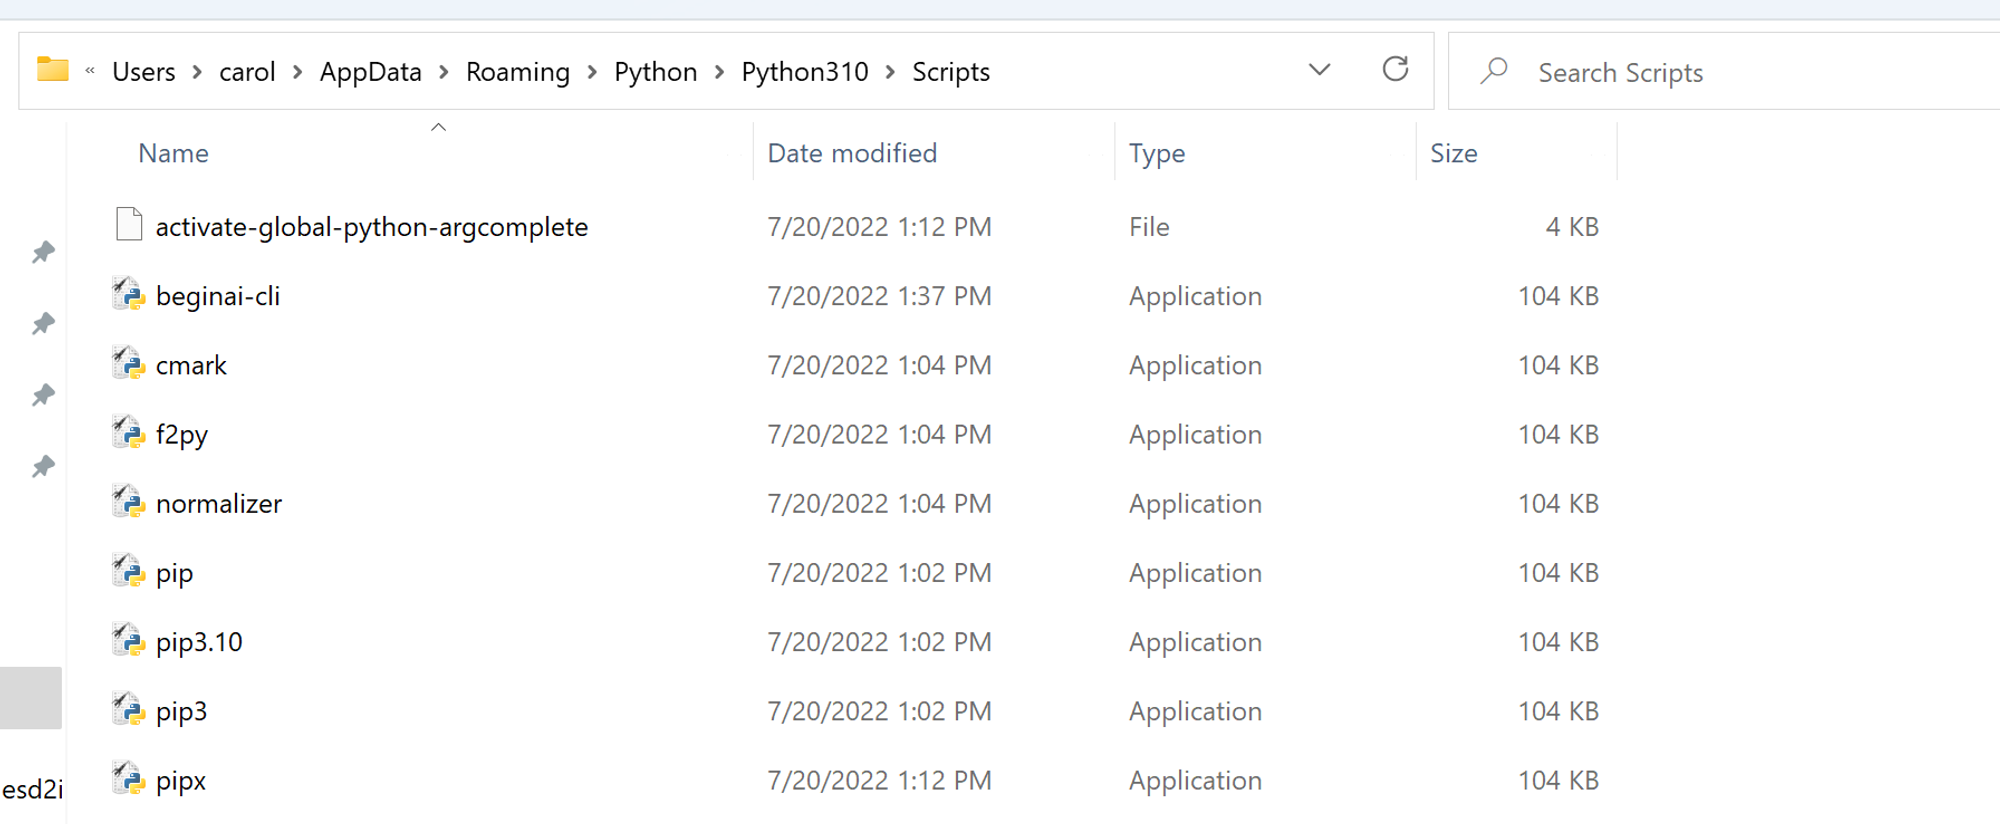
- Copy the full path from your
Navigation Bar(from the folder Scripts)
- Now, click the
Start button, then type“edit the system environment variables”into the search bar and hit Enter. Select the first option displayed
- On the opened modal, choose
Environment Variables
- Select
Pathand thenEdit
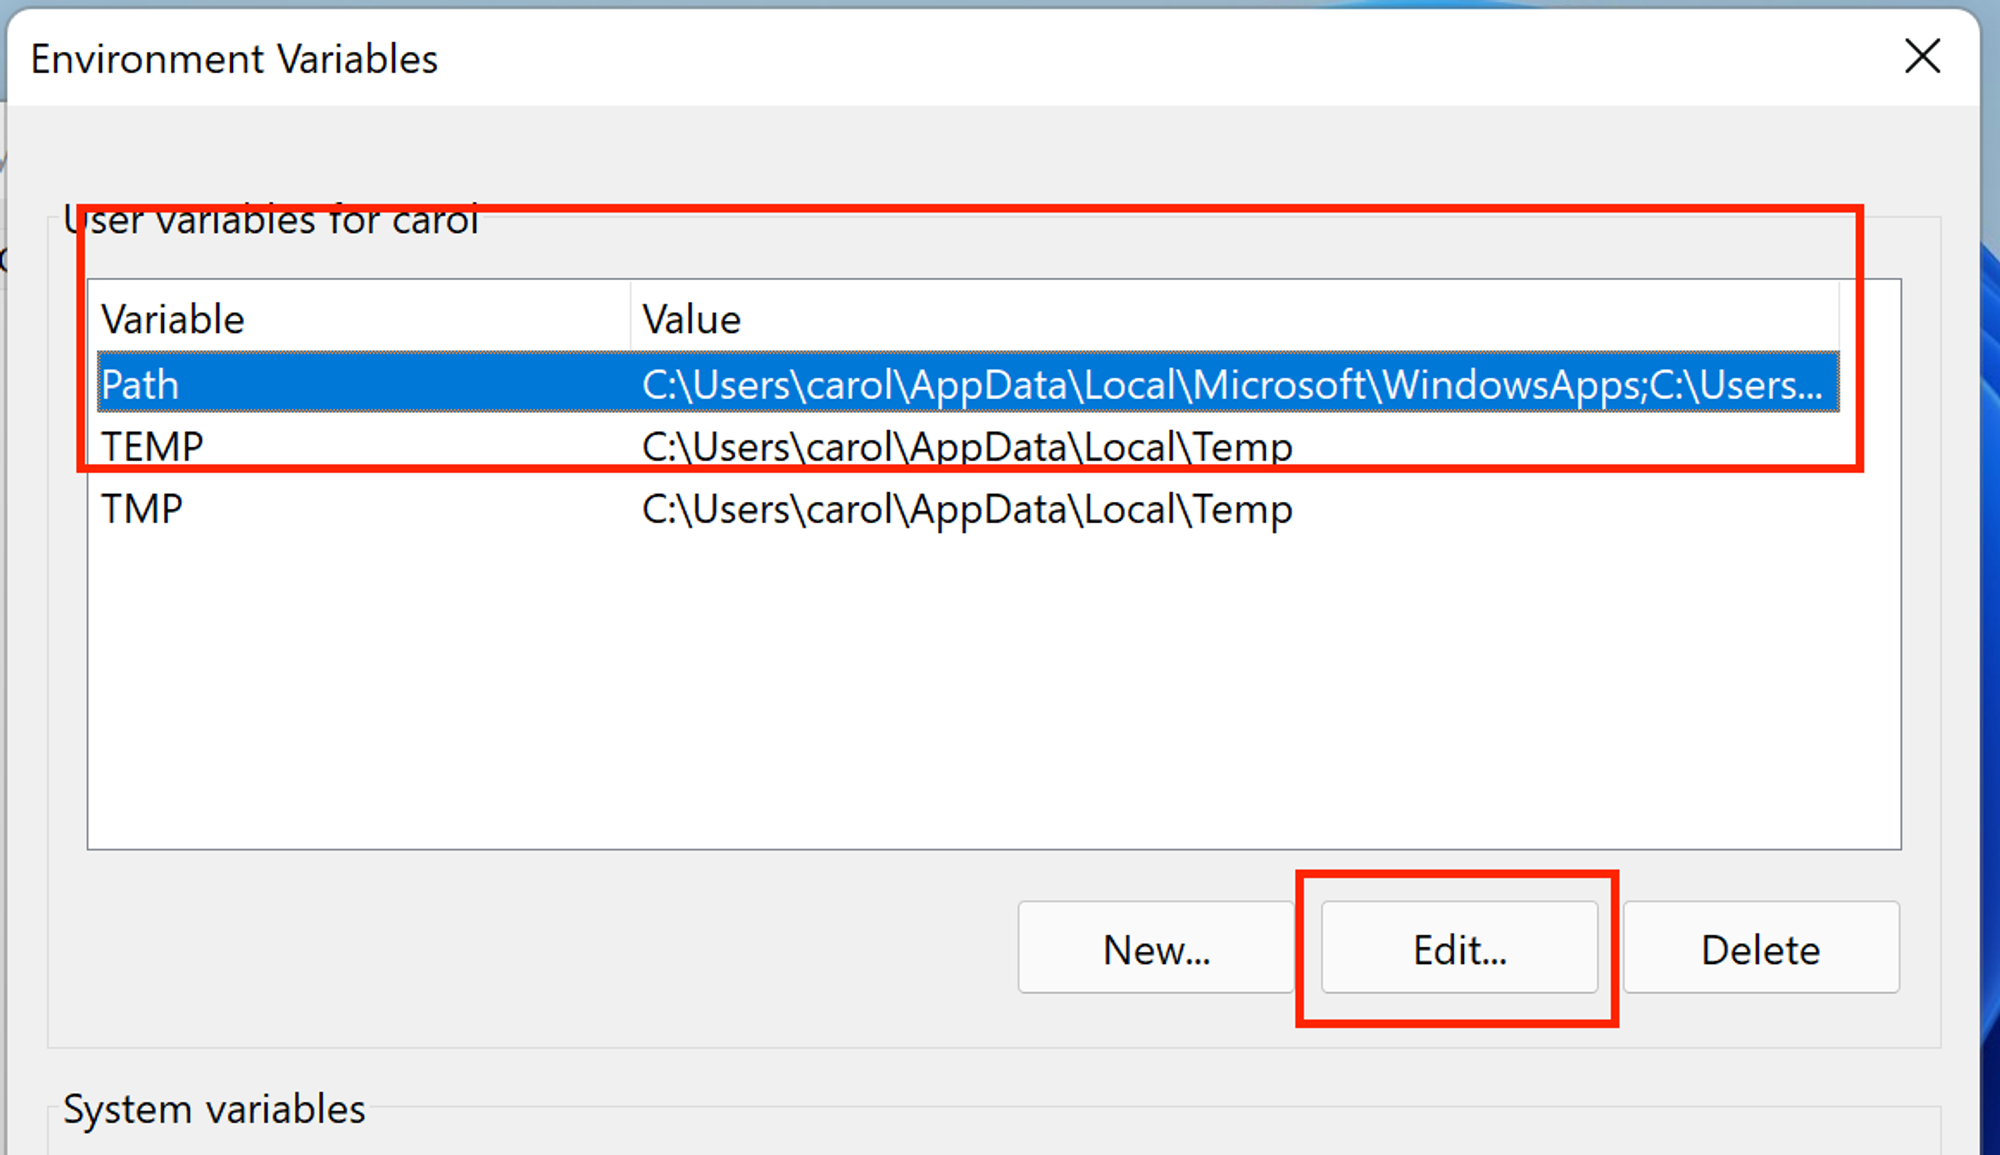
- In the next modal, select
Newand paste the path copied from the previous step
- Almost done! Hit
Okin all the modals and restart yourPowerShellterminal
- Try again with the command
beginai-cli --help
- If an error is still displayed, please reach out to our Support Team through
support at begin.ai
Processing Historical Data
Before starting processing your historical data, make sure that the following is correct:
- Your data is available in a CSV file
You can process as many files as needed as long as they are on a CSV
- The name of the columns defined on your file(s) matches the name of the attributes on your Schema (for details regarding building a Schema visit: Generate a Schema)
- You have the correct App ID and License Key (for more details visit: Find Your App and License ID)
Once your data is ready, let’s use Begin AI CLI to process it and send the signatures over to Begin’s server. Run the commands as needed based on your Schema structure, for example, if you don’t have a
user property defined on your Schema then skip that section)All of your proprietary & identifiable data remains on your computer, Begin AI CLI only generates mathematical representations of your data
Processing User Data
On a terminal, run the following command replacing
${} with the appropriate values:beginai-cli process_user_data --app-id ${app_id_uuid} --license-key ${license_key} --csv-file-location ${file_location} --column-representing-user-id ${csv_colum_name} --column-representing-label ${csv_column_representing_label} --file-separator ${csv_file_separator} --column-representing-created-at {csv_column_representing_created_at}
The arguments
--column-representing-label and --file-separator are optional.
Only provide --file-separator if your CSV uses a separator other than ,
The argument --column-representing-label should only be used if your Schema definition for the object being processed contains labels, otherwise, skip this argument
The date format is required to follow dd-mm-yyyy. For example, July 10th, 1985 will need to be expressed as 10-07-1985. Processing Object Data
On a terminal, run the following command replacing
${} with the appropriate values:beginai-cli process_object_data --app-id ${app_id_uuid} --license-key ${license_key} --csv-file-location ${file_location} --column-representing-object-id ${csv_colum_name} --object-name ${object_name_as_defined_on_schema} --column-representing-label ${csv_column_representing_label} --file-separator ${csv_file_separator} --column-representing-created-at {csv_column_representing_created_at}
The arguments
--column-representing-label and --file-separator are optional.
Only provide --file-separator if your CSV uses a separator other than ,
The argument --column-representing-label should only be used if your Schema definition for the object being processed contains labels, otherwise, skip this argument
The date format is required to follow dd-mm-yyyy. For example, July 10th, 1985 will need to be expressed as 10-07-1985. Processing Session Data
On a terminal, run the following command replacing
${} with the appropriate values:beginai-cli process_session_data --app-id ${app_id_uuid} --license-key ${license_key} --csv-file-location ${file_location} --column-representing-object-id ${csv_colum_name} --object-name ${object_name_as_defined_on_schema} --column-representing-label ${csv_column_representing_label} --column-representing-created-at ${csv_column_representing_created_at} --file-separator ${csv_file_separator}
Only provide
--file-separator if your CSV uses a separator other than ,
The date format is required to follow dd-mm-yyyy. For example, July 10th, 1985 will need to be expressed as 10-07-1985. Processing Interactions
On a terminal, run the following command replacing
${} with the appropriate values:beginai-cli process_interactions --app-id ${app_id_uuid} --license-key ${license_key} --csv-file-location ${file_location} --column-representing-user-id ${csv_colum_name} --column-representing-object-id ${csv_colum_name} --object-name ${object_name_as_defined_on_schema} --column-representing-action ${csv_column_representing_action_as_defined_on_schema} --file-separator ${csv_file_separator} --column-representing-created-at {csv_column_representing_created_at}
The argument
--file-separator is optional. Only provide --file-separator if your CSV uses a separator other than ,
The date format is required to follow dd-mm-yyyy. For example, July 10th, 1985 will need to be expressed as 10-07-1985. Processing Large Datasets
We recommend splitting your CSV into multiple smaller CSVs if you’re processing a large amount of data. Every time you make the call for one of the methods, that CSV is processed and the data is sent to Begin AI
How large is “too large”? Our recommendation is: if your laptop can’t handle it, split it. An average laptop can process about 300k records in 30 minutes on a dataset with 30 features.