Generate a Schema
A schema is used to describe your unique business data, modelling your company’s chosen entities as Objects. These objects include the default
User as well as any other you may need. For example, Post, Book, Order or Hotel Room.Objects in Begin AI can be described in greater detail using Attributes and Labels. The way a user may interact with other users or objects is described using Interactions.
In order to start the learning process, you’ll need to create and publish your first Schema. Once a version is published, you are able to make further changes, which are saved for you in a draft until you are ready to Publish again.
This article will walk you through the steps for building your own schema using a bookstore example.
Quick Links
The Schema BuilderParts of the Schema BuilderAdding a new ObjectAdding an Object AttributeAdding an Object LabelAdding an Object InteractionAdding an Attribute to an Object InteractionPublishing your SchemaSchema JSON (Advanced)Next StepFurther Readings
The Schema Builder
The Schema Builder is our tool that enables you to describe the objects that represent your entities in smaller parts.
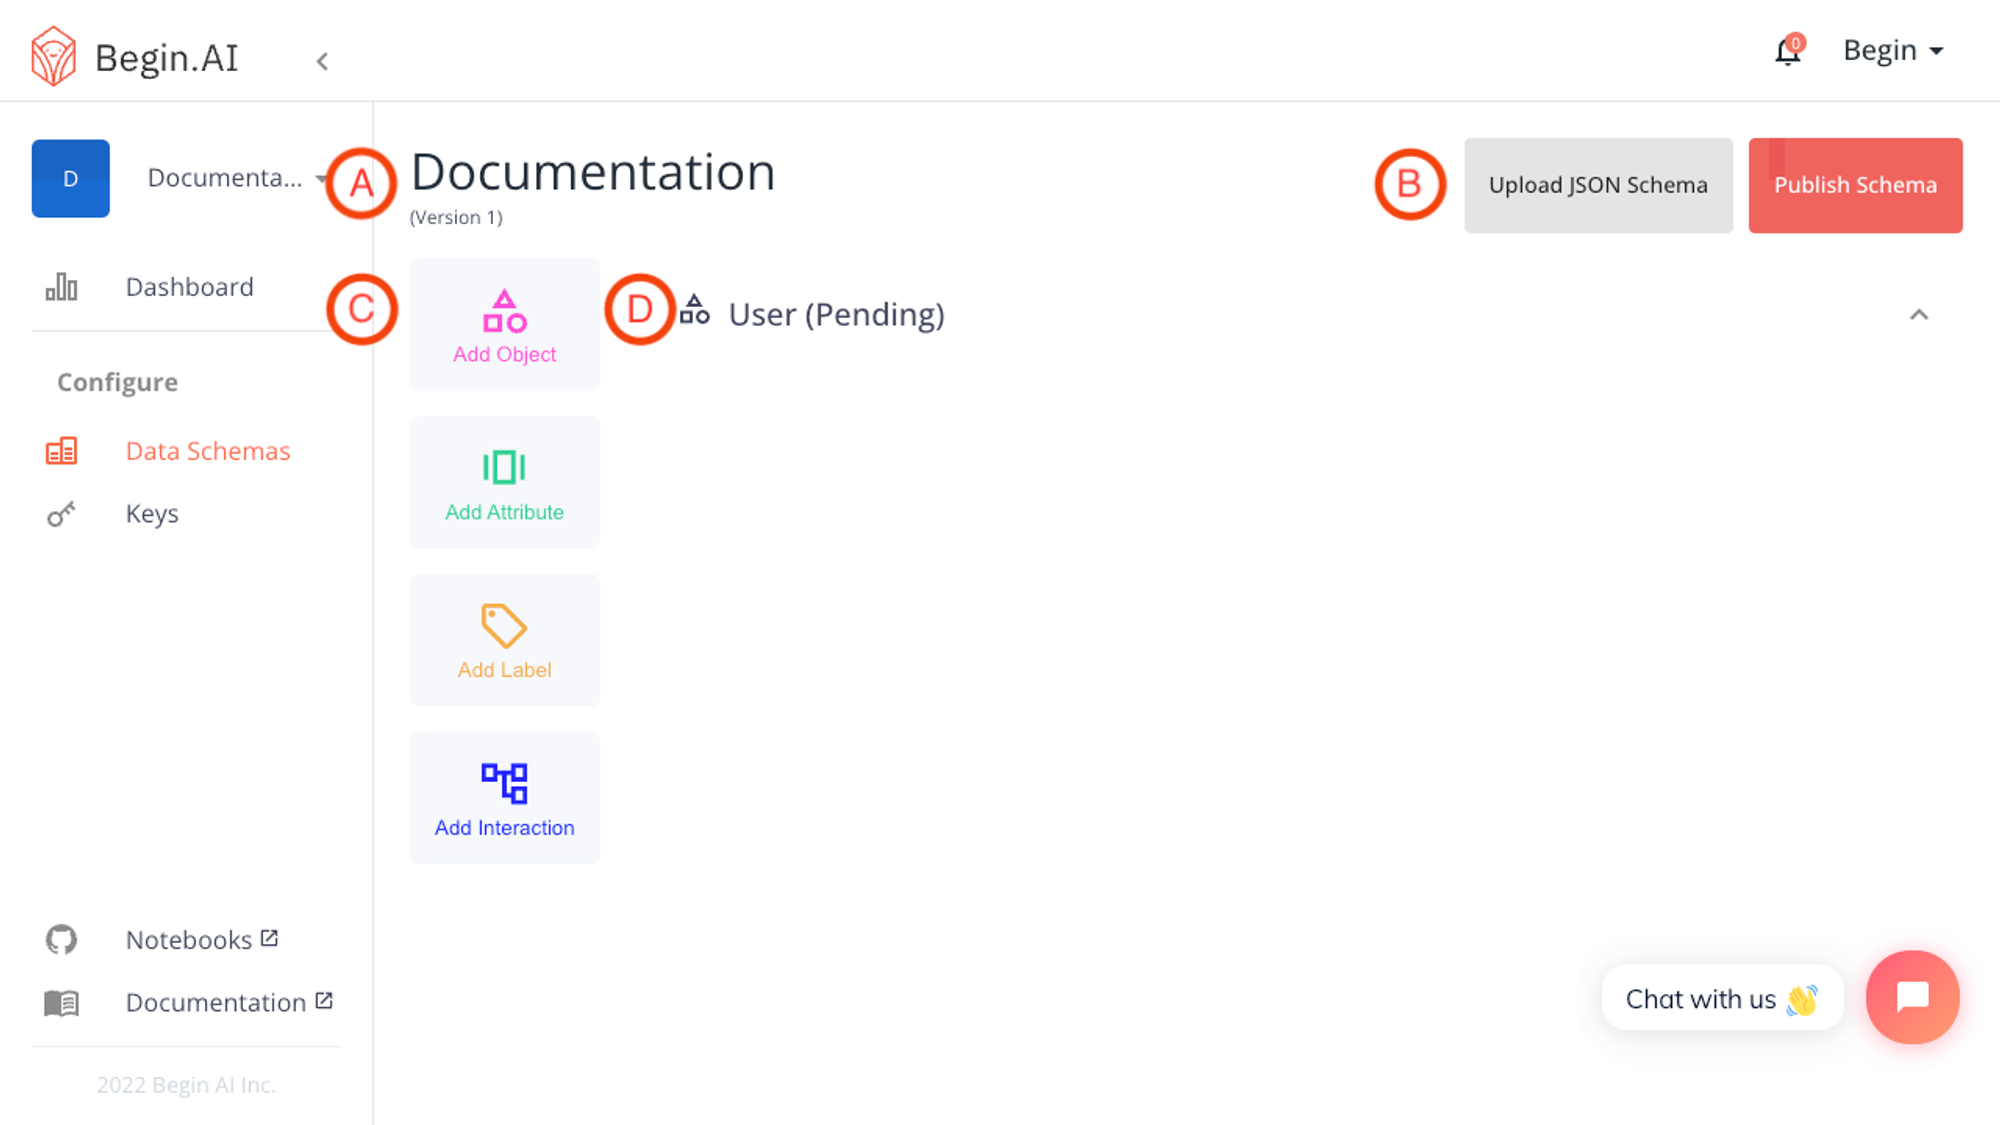
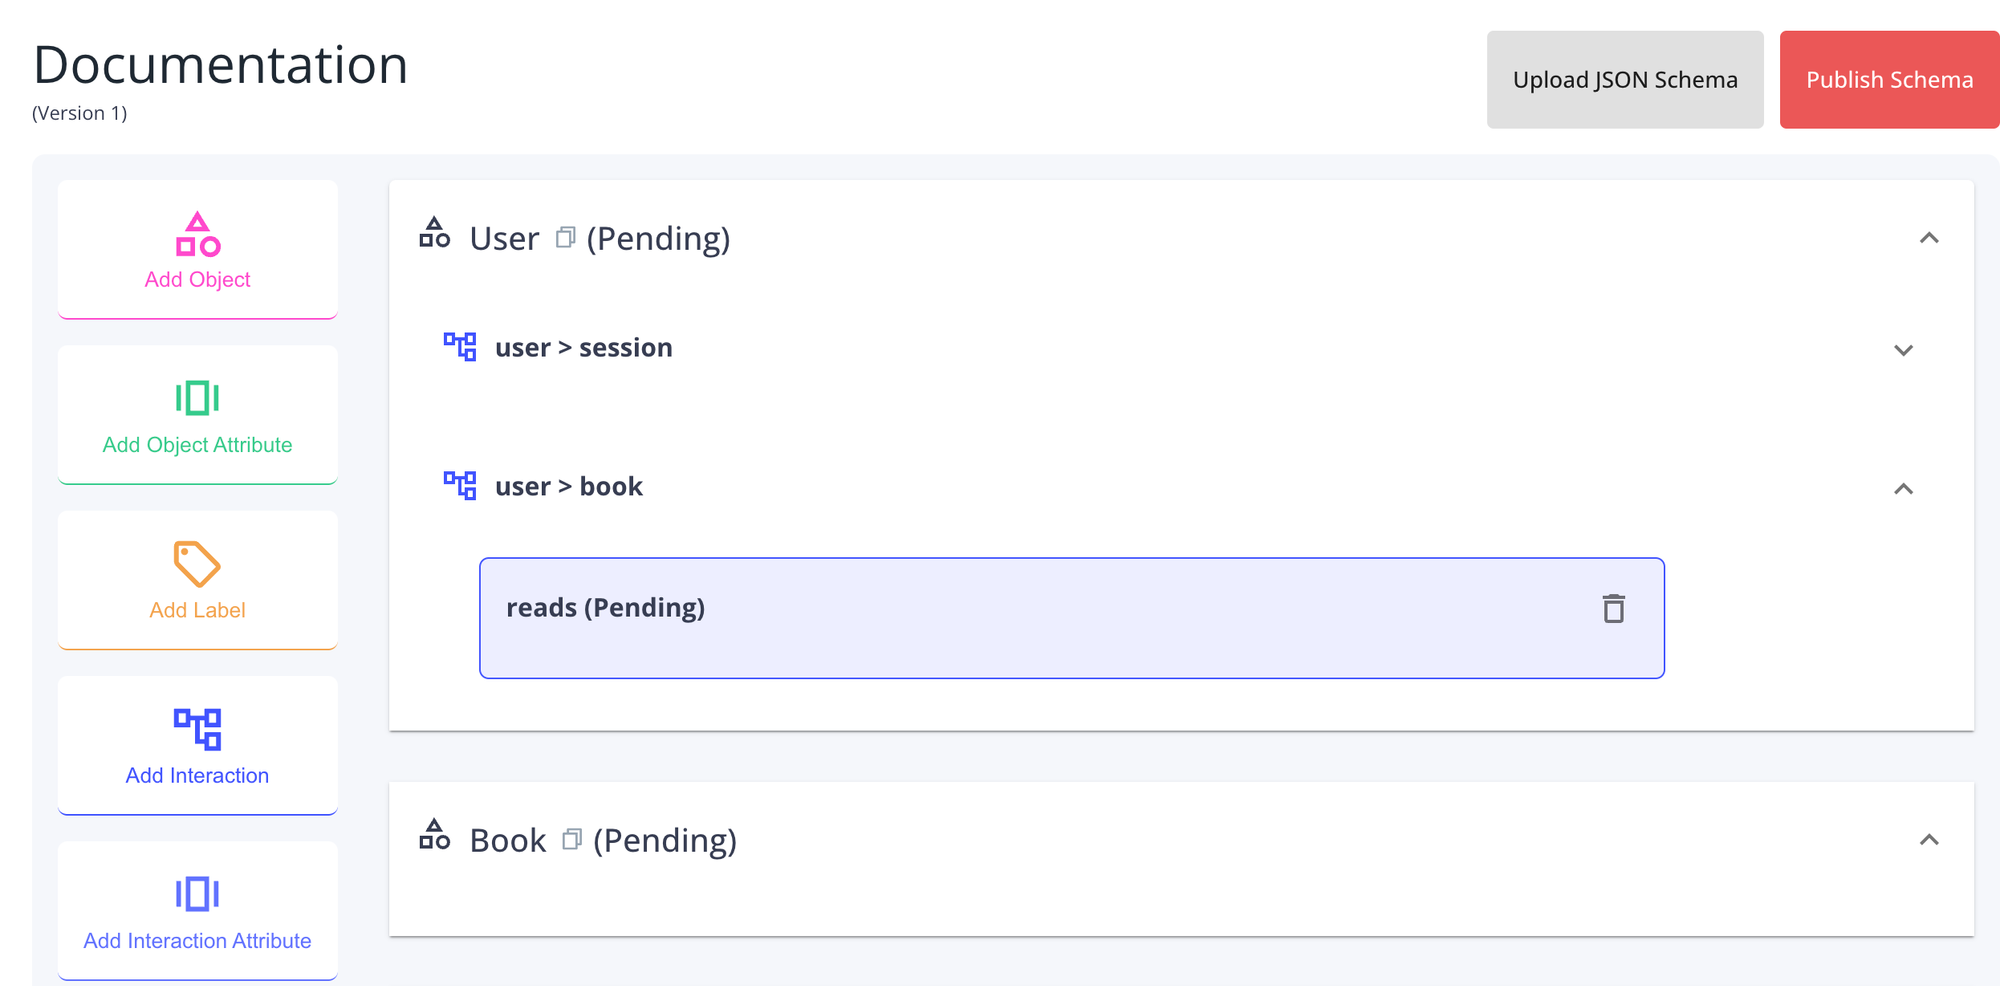
Parts of the Schema Builder
A: Schema Title and Version information
Here you will find the current name and version id of the Schema in your team. Schema versions are integer-based, beginning with version 1
B: Schema Version Toolbar
The Schema Version includes buttons for uploading a JSON Schema (Advanced) and for publishing a new schema for Begin AI to learn from.
C: Schema Building Toolbar
The core activities of building a schema are included here. Using these simple building blocks, you will be able to describe and customize your entities.
D: User Object (Default)
The default object in any new team is a User object. This can be appended to include your organization's data points as needed, but cannot be removed or renamed.
Adding a new Object
Clicking the Add Object button will open up a form for you to select your new object's name. The name is automatically formatted to be lowercase with the snake_case format. The provided preview will let you see how your object name will be formatted.
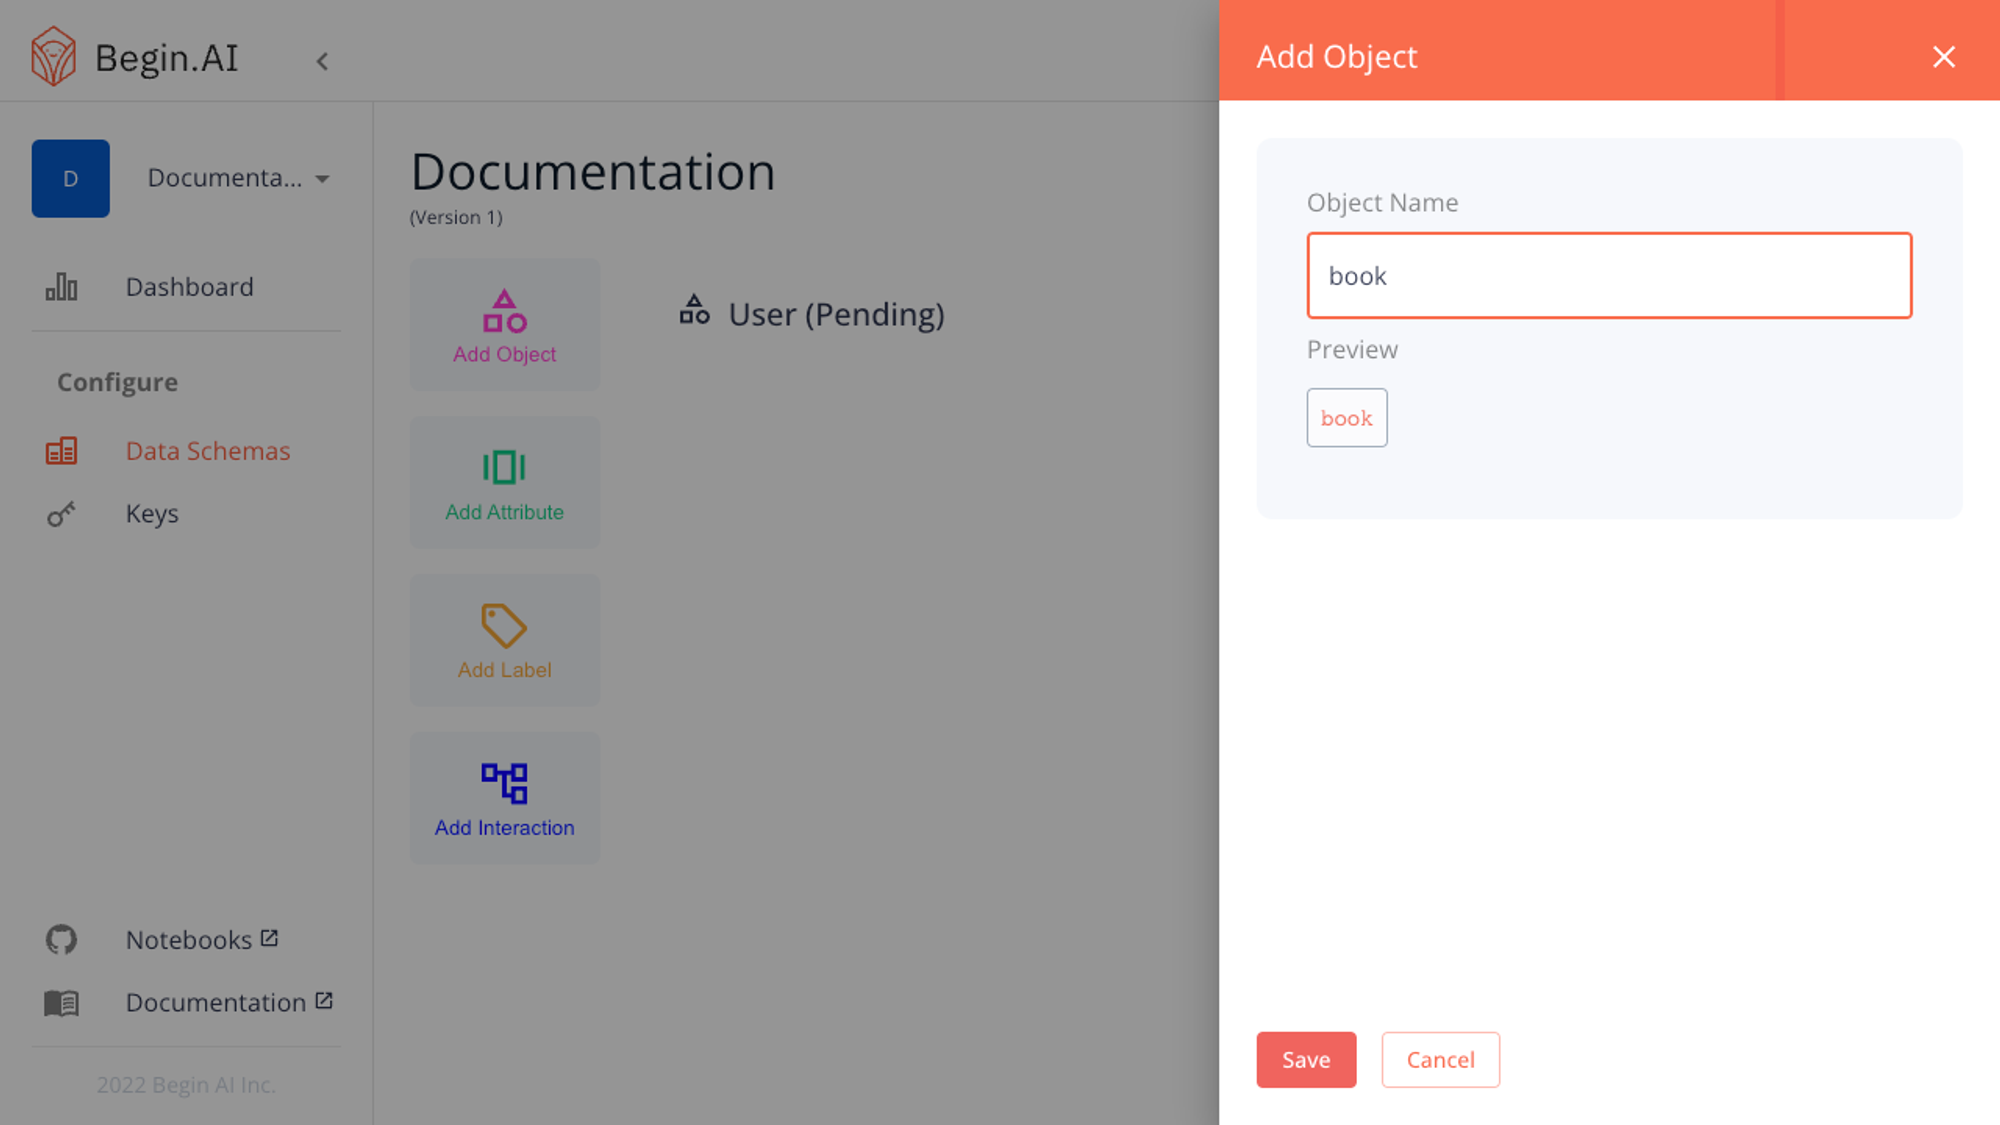
Once you have selected a name and saved the object, you will see it appear on your schema draft with
Pending status.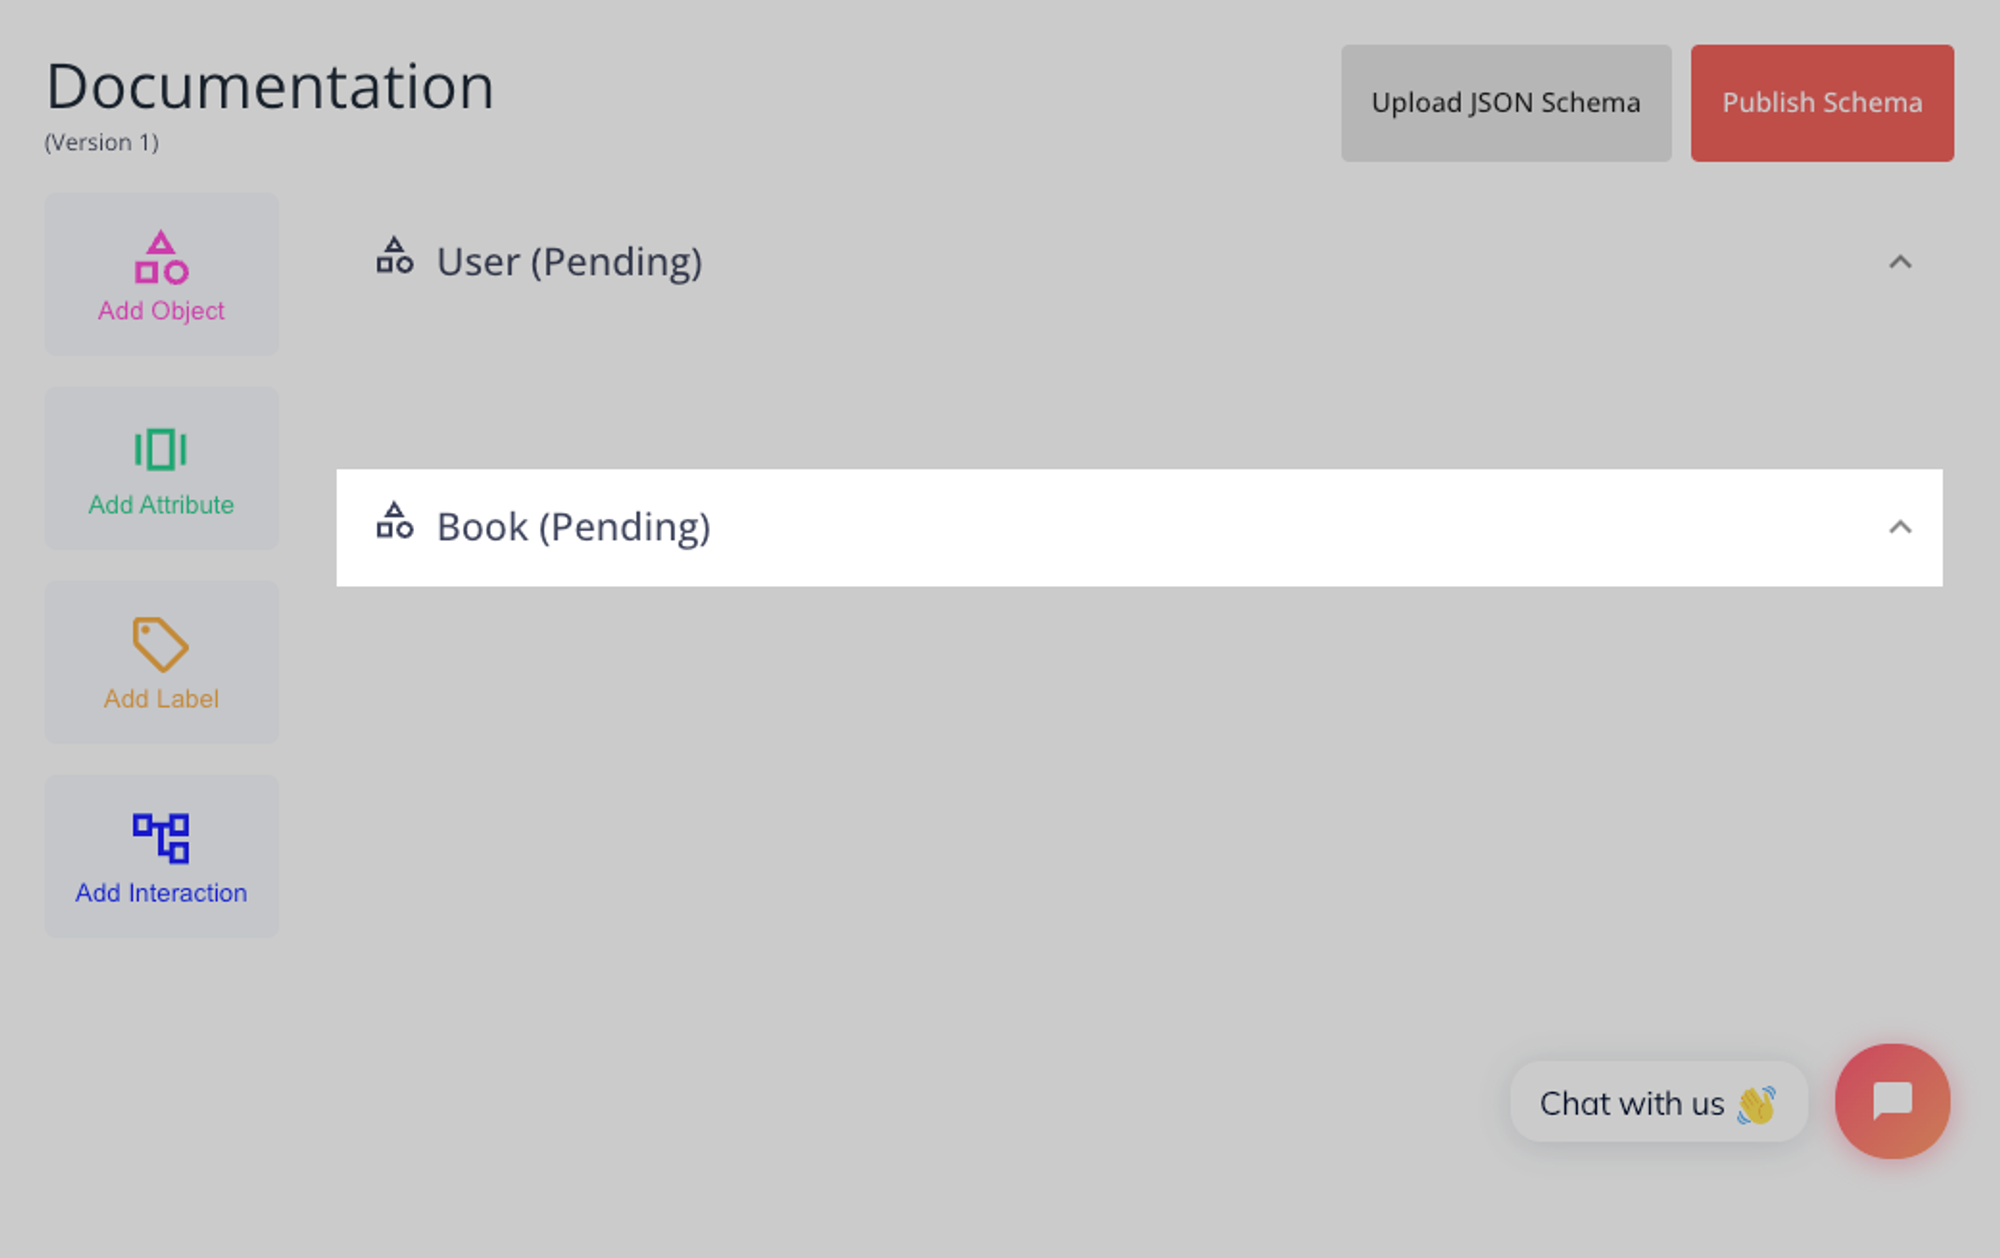
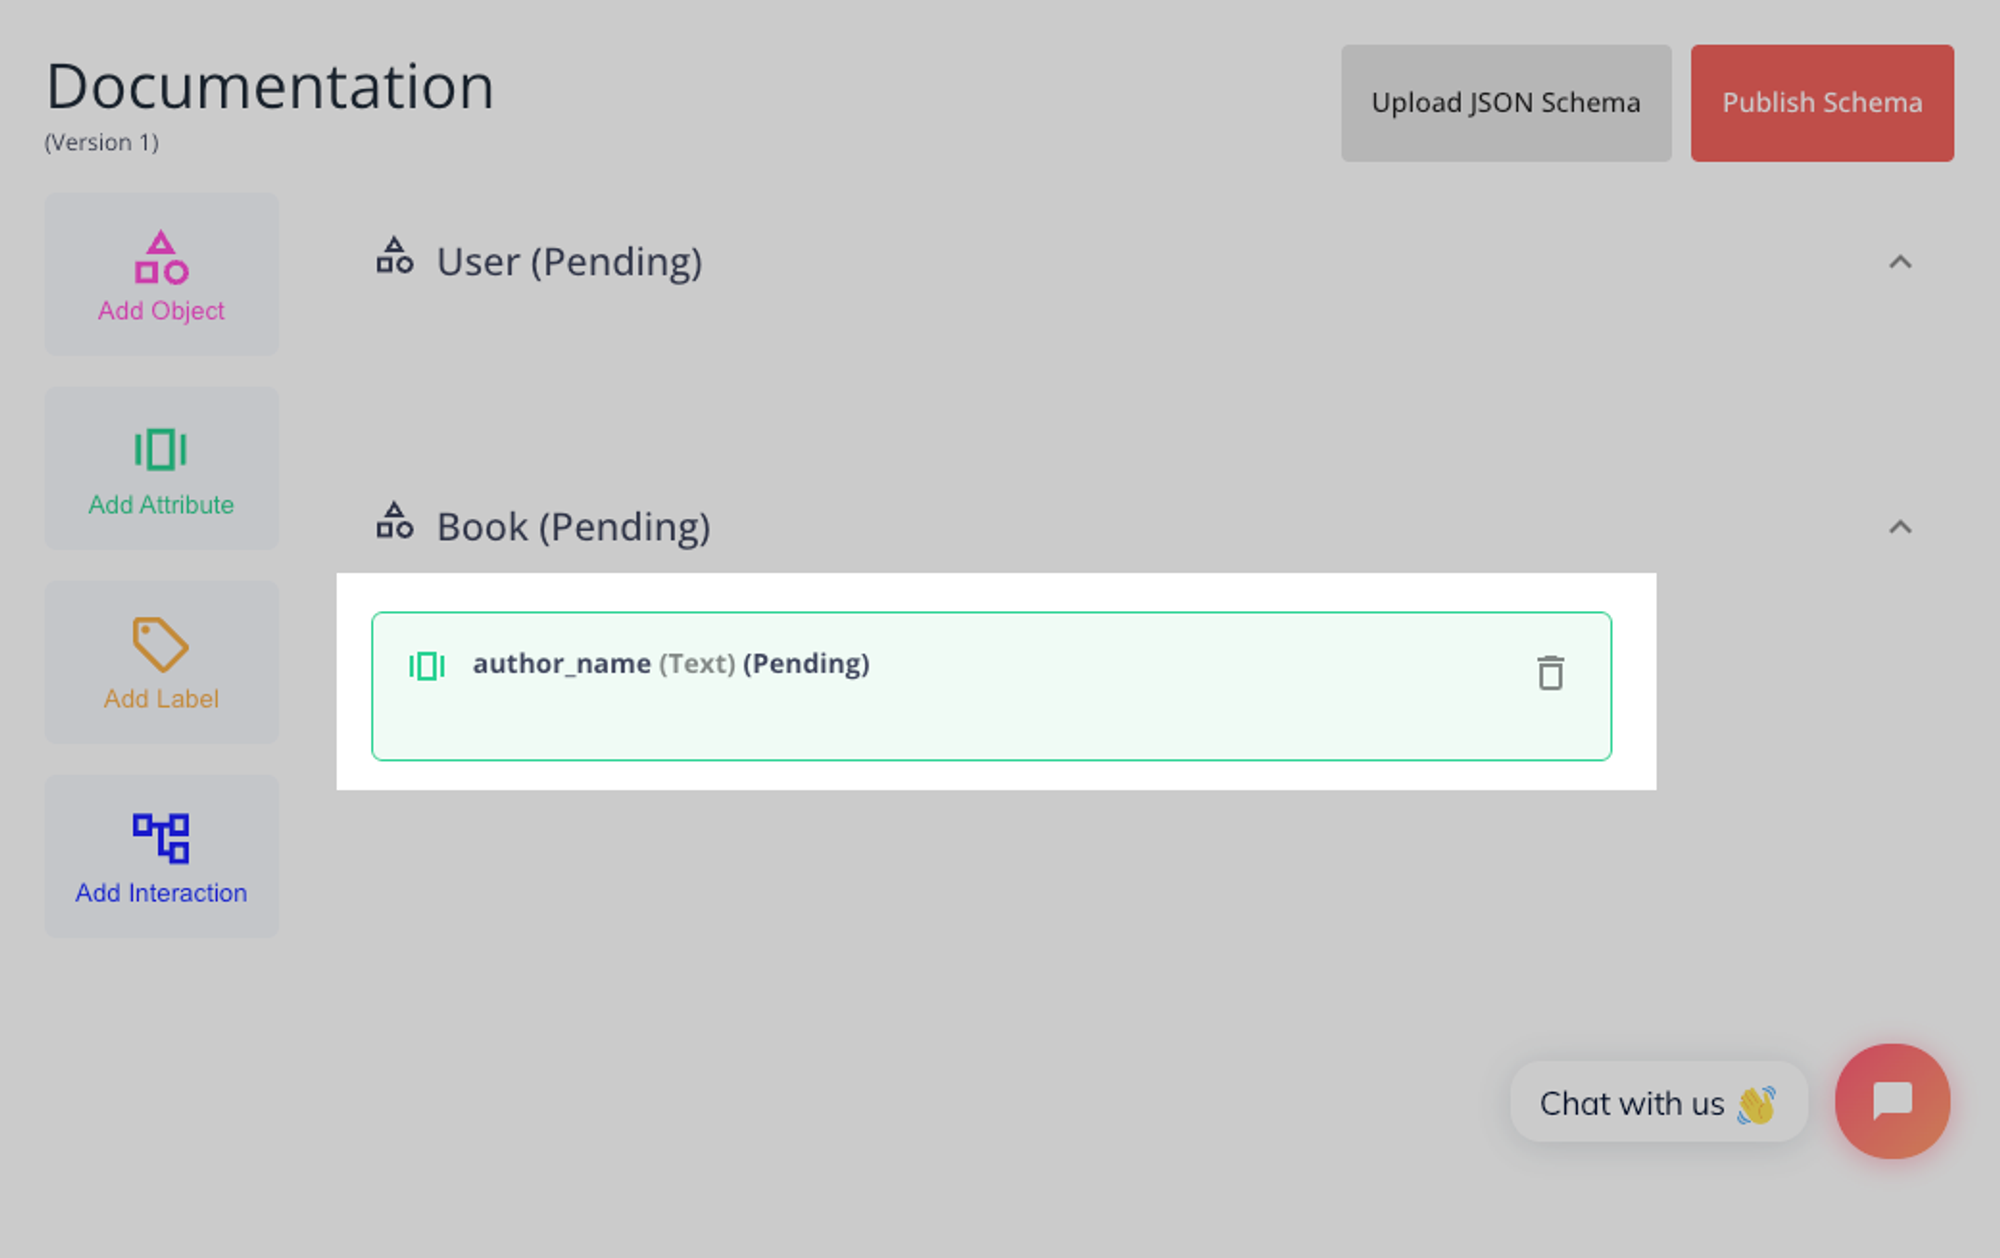
Adding an Object Attribute
Attributes allow you to add more detail to your objects. They are composed of a name and a type, with further parameters available for some of the types.
The types available are:
id
boolean
lat/lng location
number, includes optional parameters forminv,maxvandnum_slices
date, includes an optional parameter formin_date
category, includes required options for category names
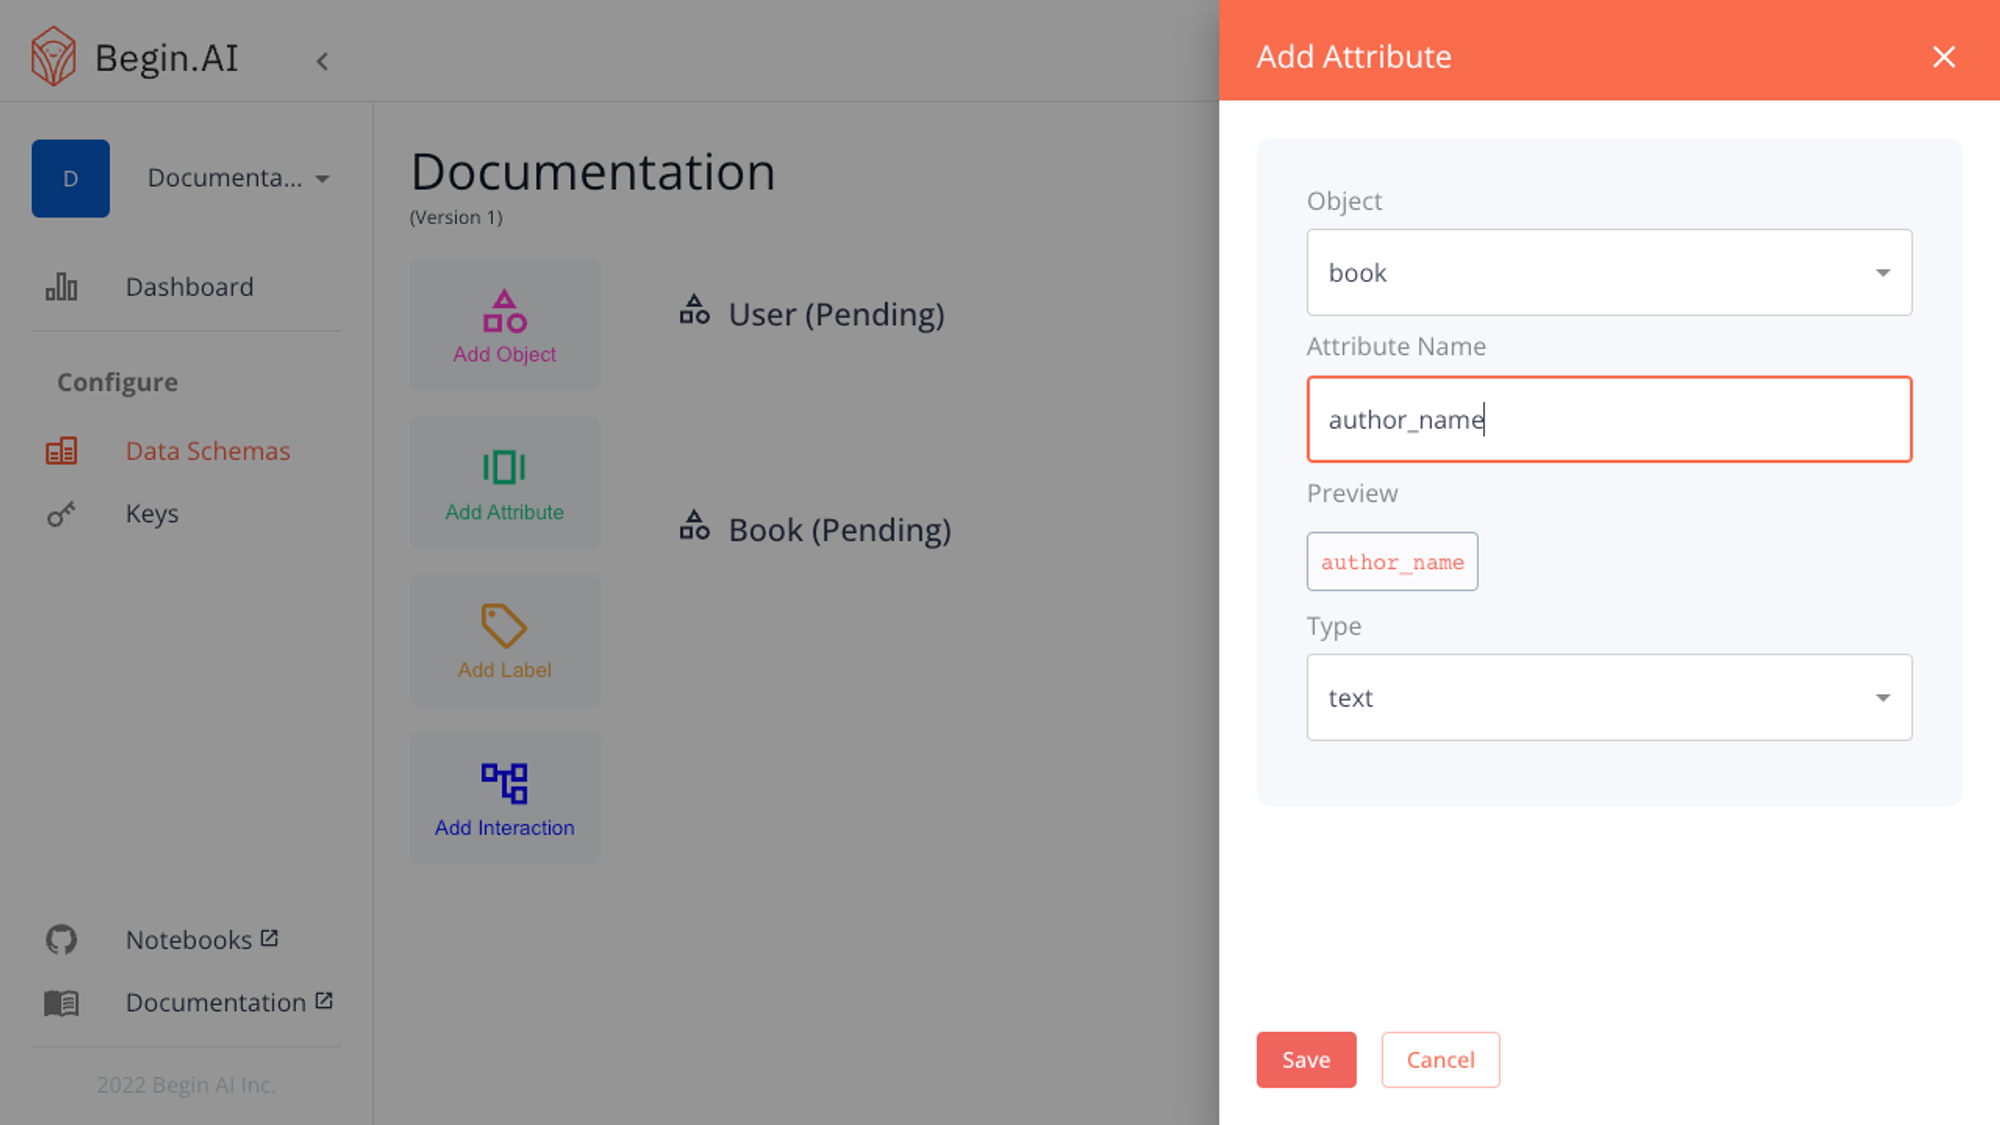
Once you have selected the name and type, saving the attribute will add it to your draft schema.
Adding an Object Label
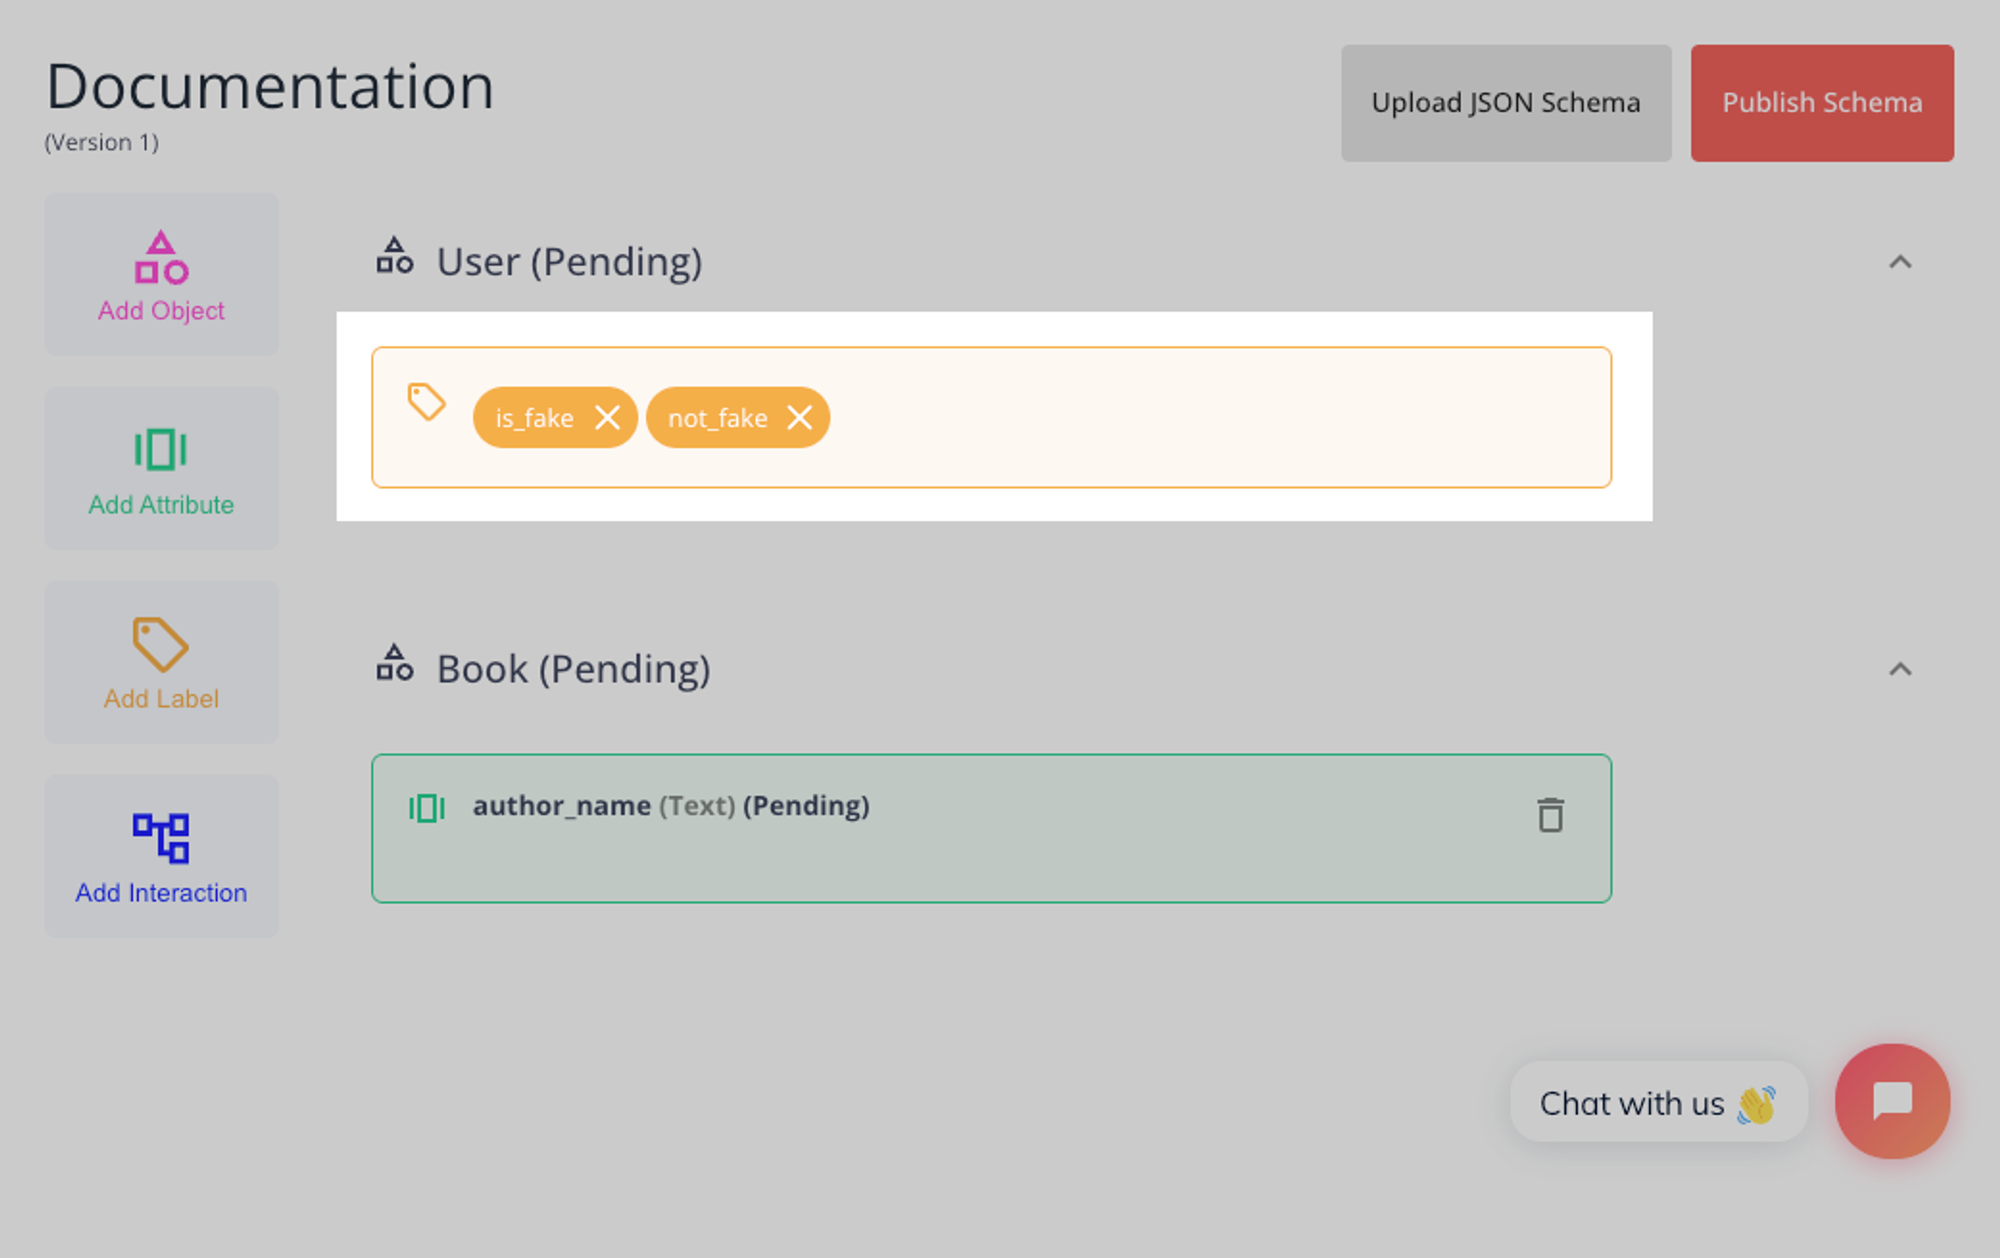
Labels can be used to classify objects. In our example, we will add two possible user labels:
is_fake and not_fake.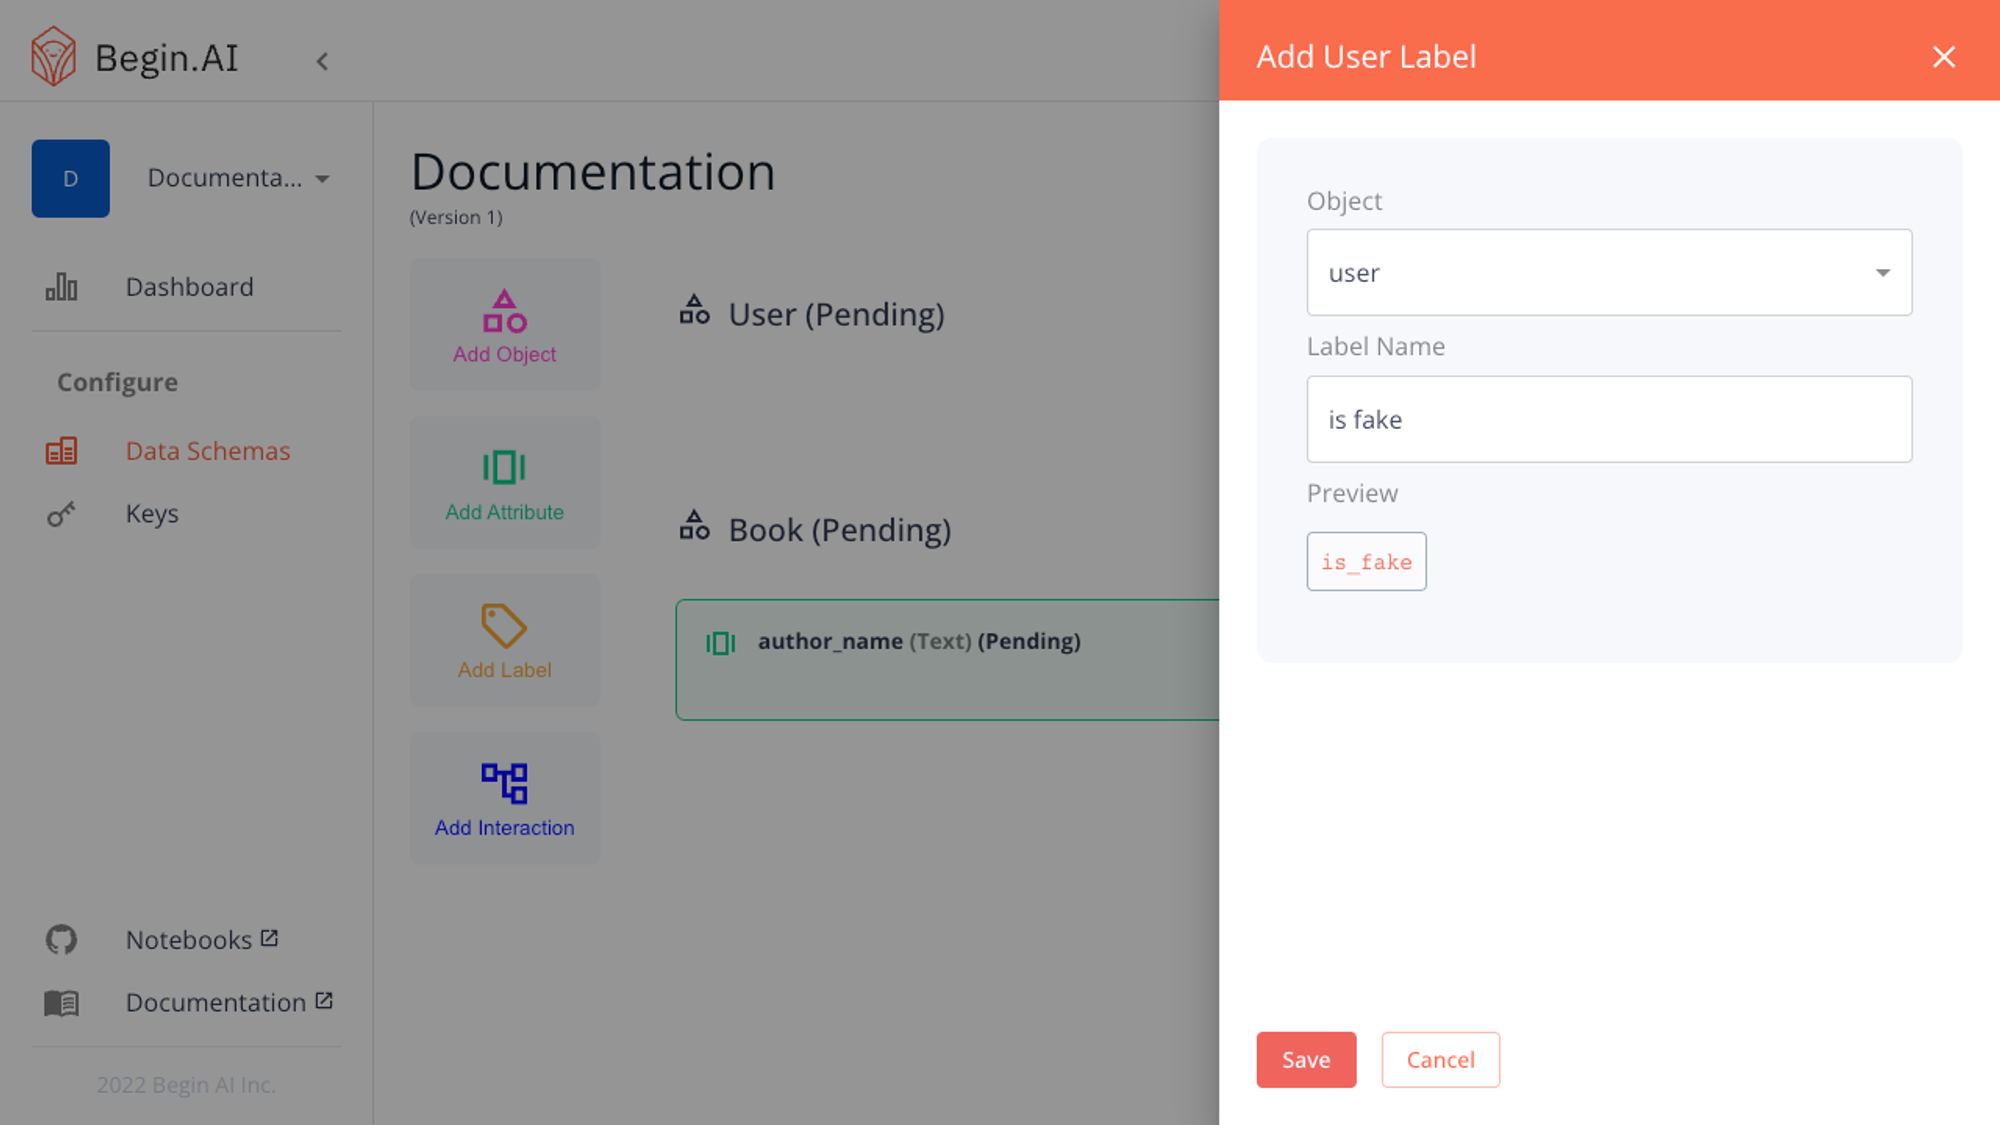
When we’re ready with both the user object will display all known labels in small chips.
Adding an Object Interaction
Interactions help to describe connections between the user and other users, or other objects in your schema. The Interaction comprises a name and potential attributes (attributes are optional)
We’ll add an interaction to the book object which describes an action a user may take.
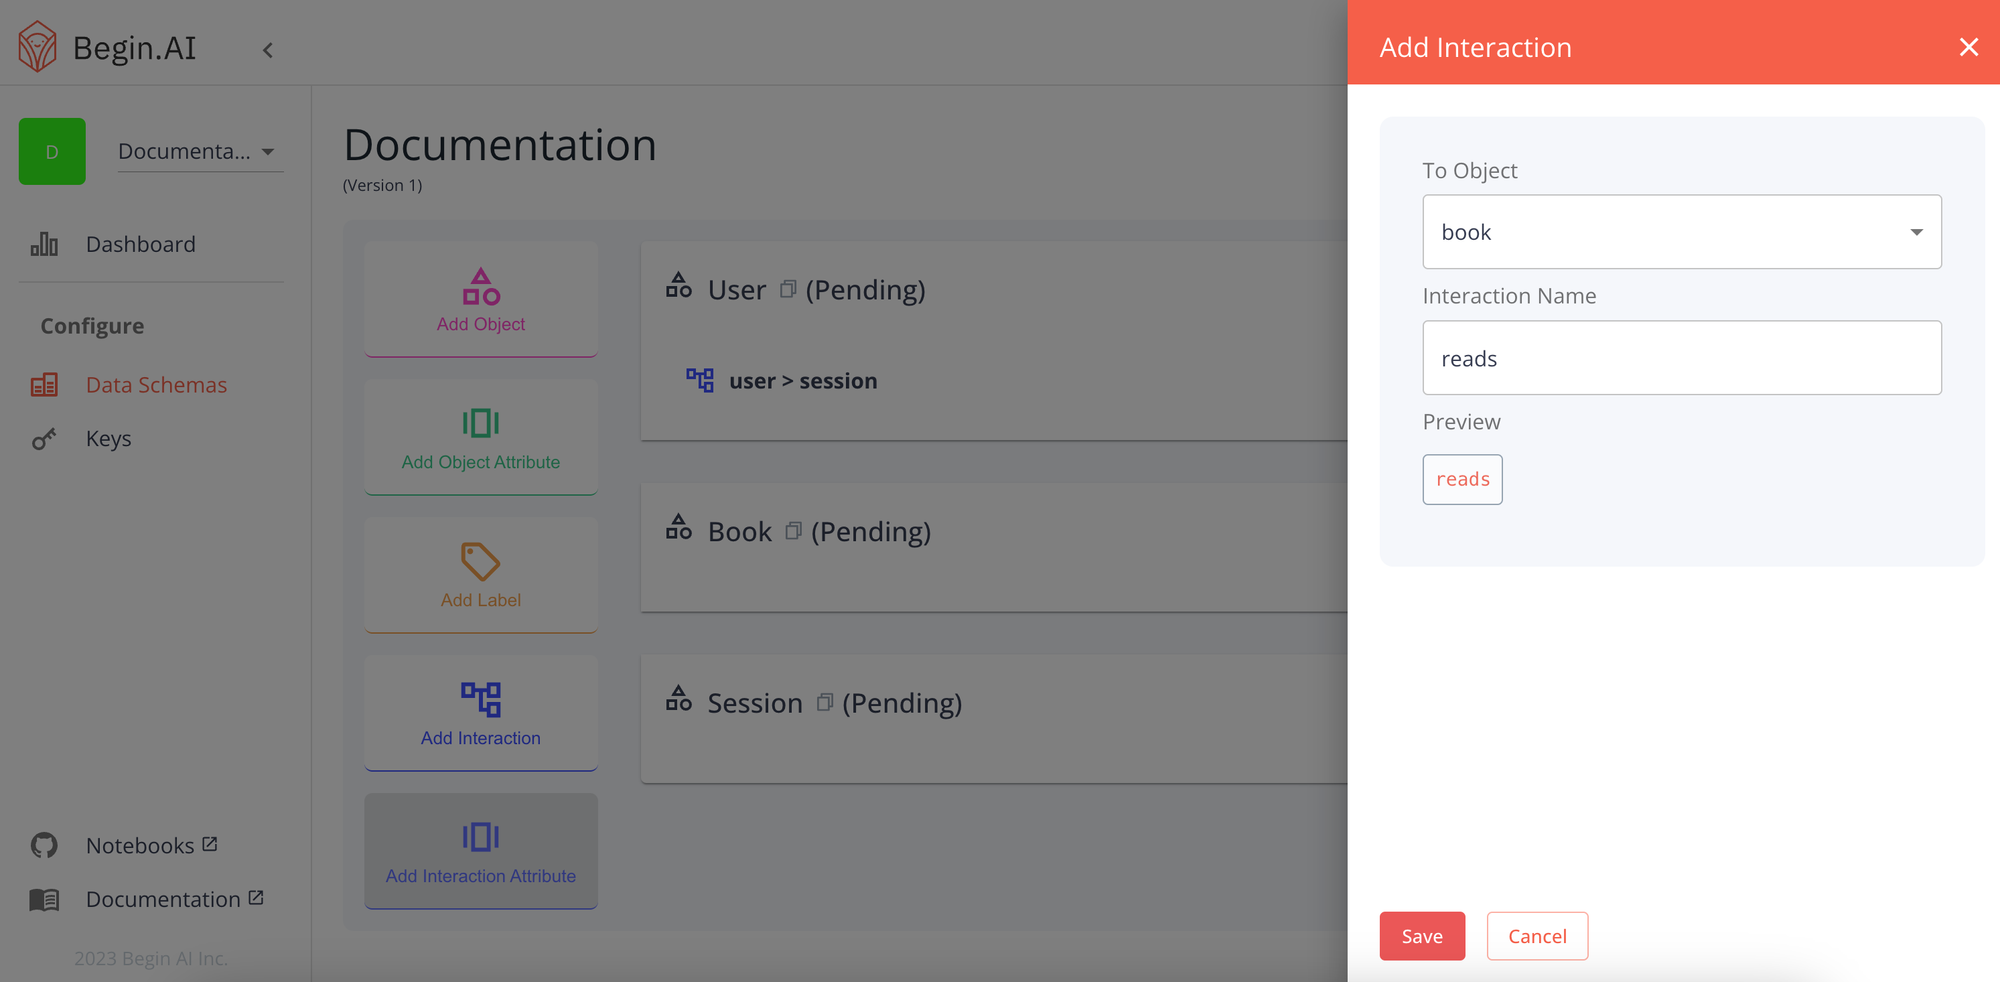
Saving the interaction will add it to your user object in your schema draft.
Adding an Attribute to an Object Interaction
Attributes allow you to add more details to the interaction between two objects. They are composed of a name and a type, with further parameters available for some of the types.
The types available are:
boolean
number, includes optional parameters forminv,maxvandnum_slices
date, includes an optional parameter formin_date
category, includes required options for category names
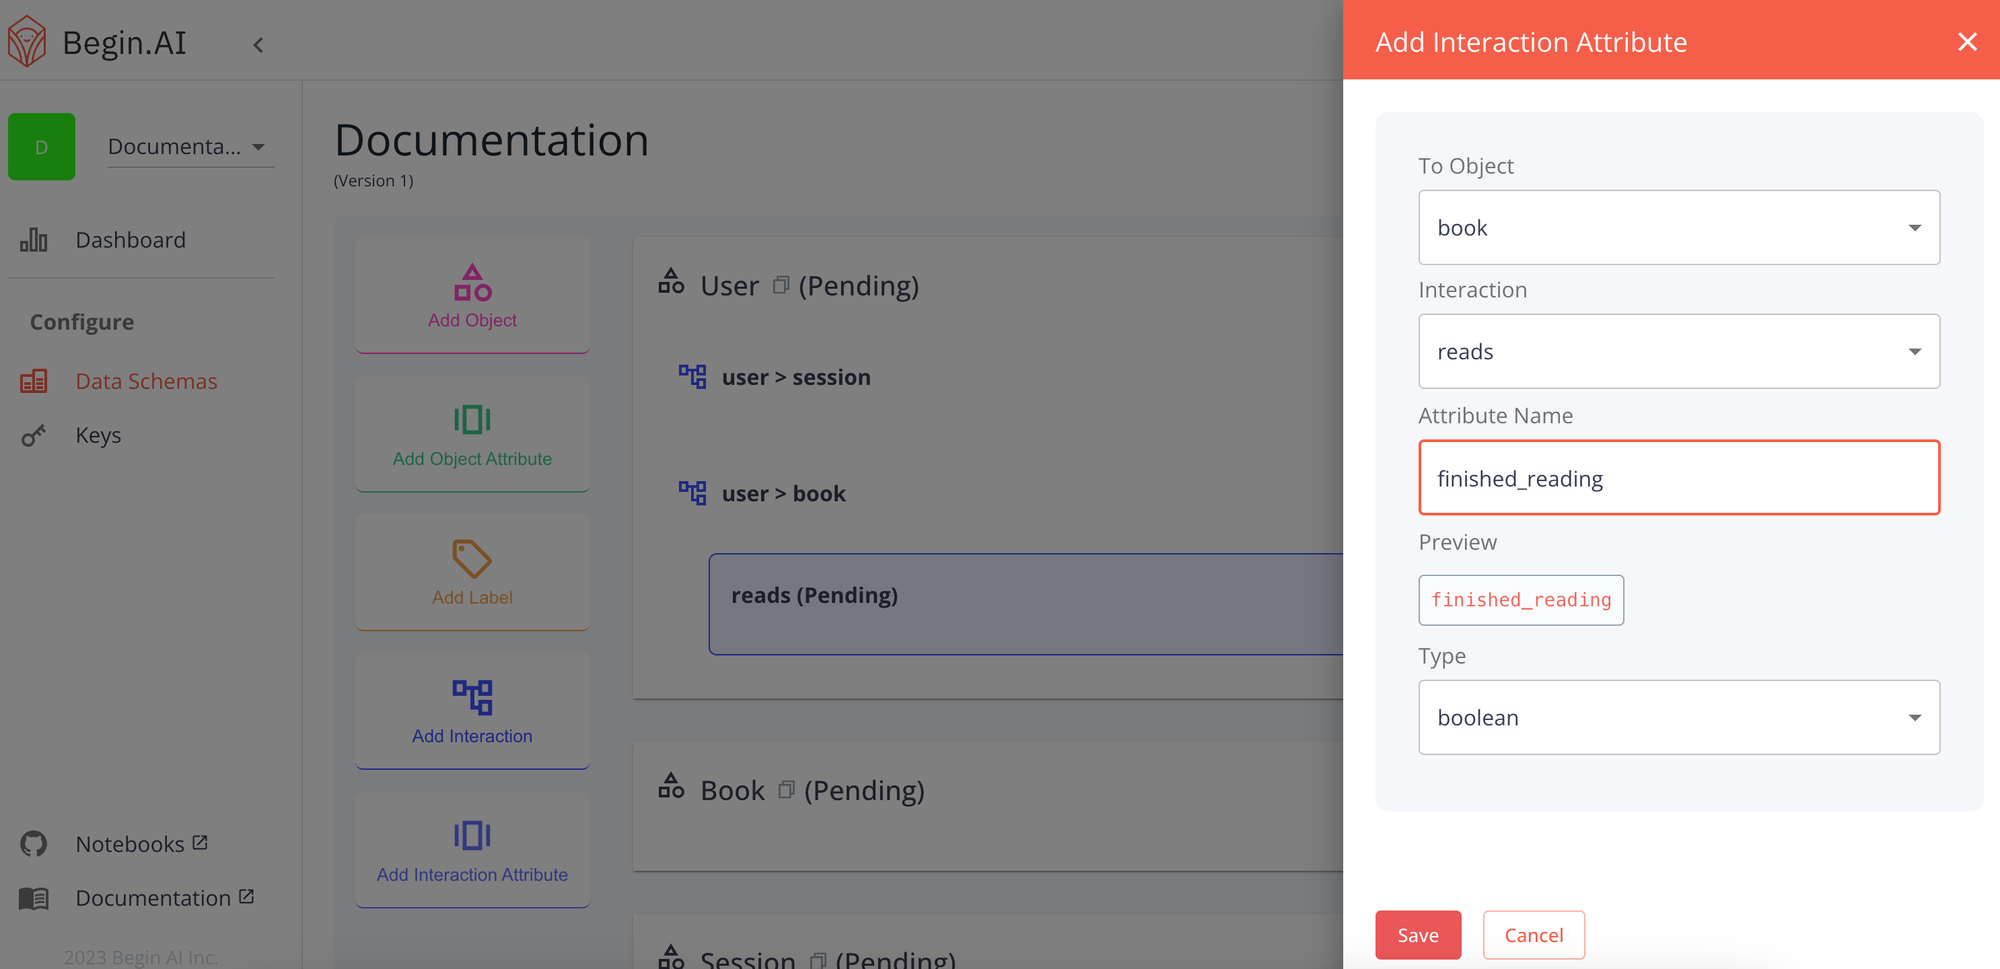
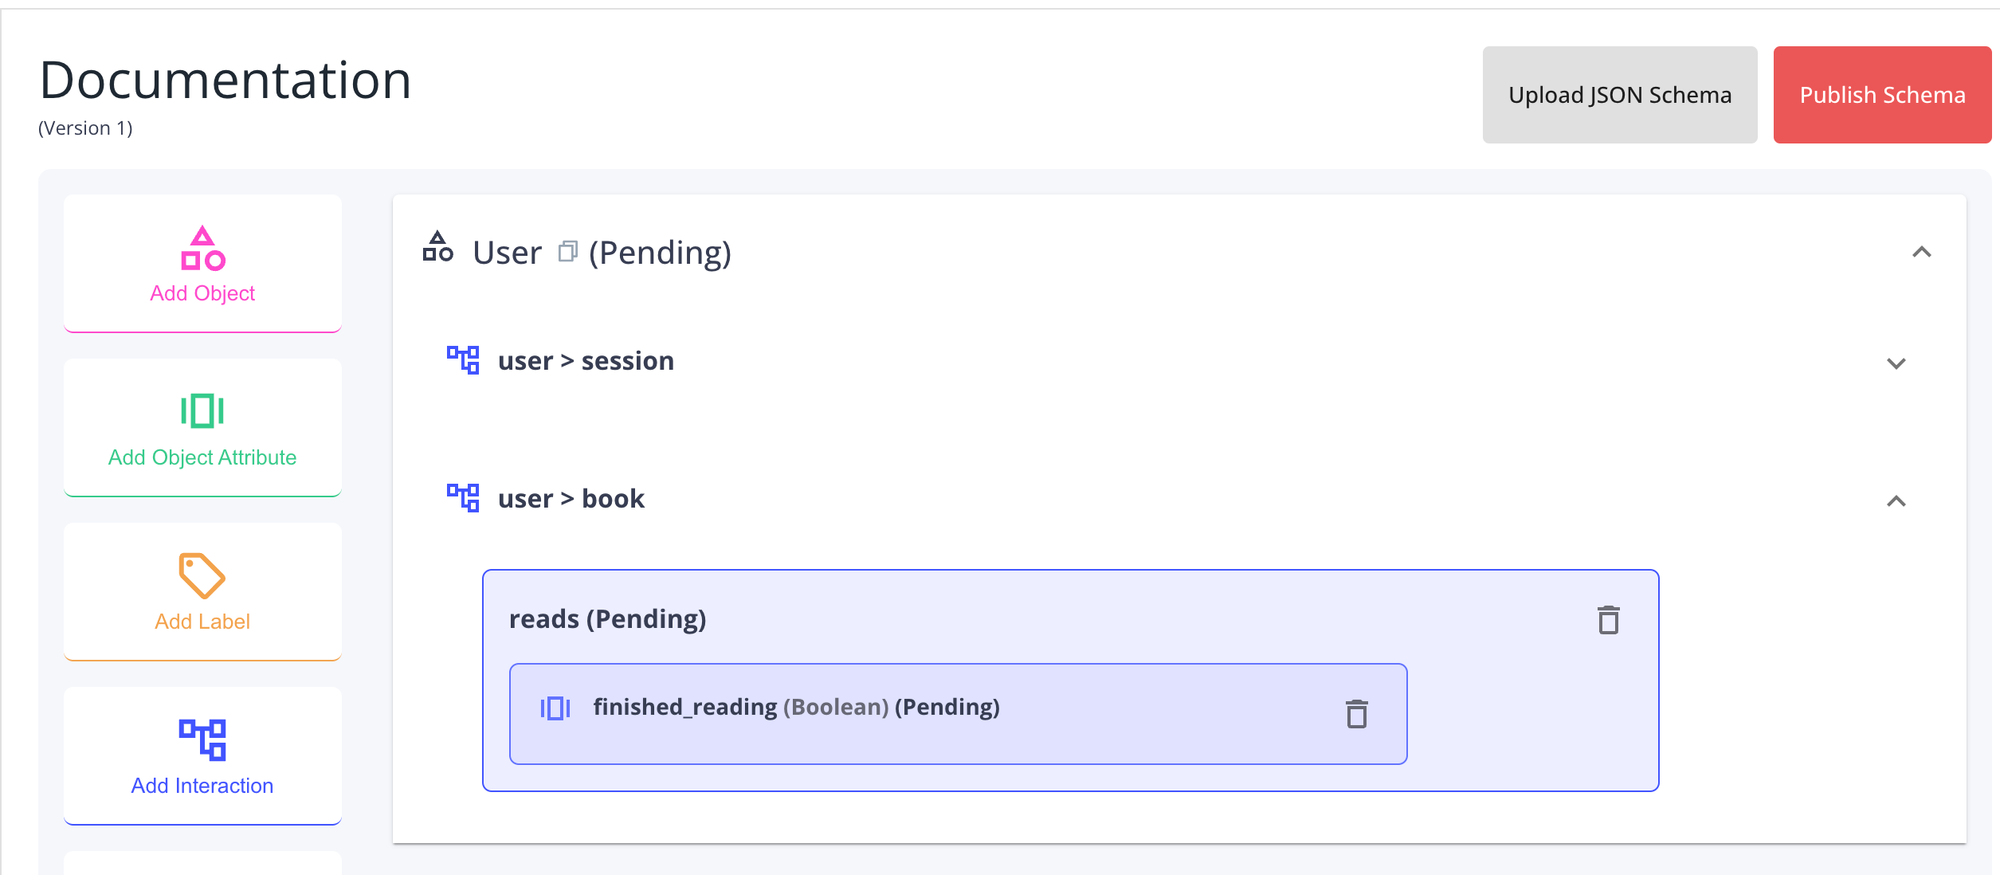
Saving the attribute will add it to the interaction.
Publishing your Schema
Once your schema is ready you can publish it using the Publish button on the Schema Version Toolbar. This action will consolidate all of your pending changes in our backend. You will now be able to target your new Active Schema with any new algorithm projects you create!
When you revisit the Data Schema page, you will be presented with your newly composed Draft Schema, allowing you to make further changes. The Schema Version Number will increase with every publication. Changes to your draft will not affect your active algorithm projects.
Schema JSON (Advanced)
For a team with no previously published Schema versions, we offer the option to upload a schema draft in JSON format.
This option will be available on the Schema Version Toolbar until your first version is published. On the upload screen, you will be able to select a JSON file from your computer, which will be loaded into a preview. You will need to run the validation and correct any structural errors before saving. When uploaded, you will be returned to the Schema Builder to make any further changes, or to publish.
Each schema is broken into different parts:
1. Schema Flag
The initial key,
schema, flags the document as a schema file for our training algorithm. This is mandatory and must be the only top-level item in the schema. { "schema": {} }
After the schema flag, define the following objects at the root level:
2. User
Defines the aspects of a user relevant to the learning model. (For example, user names, date of birth, location, etc.)
{
	"schema": {
		"user": {}
		}
}
3. Other Objects (eg. Song, Book, Album, Shelf, Product, etc.)
You can optionally define other objects in your schema that the user interacts with (books, magazines, libraries, events, etc). Defining these objects enables you to use them as sources to run your machine-learning algorithms.
For example, a bookseller using our recommendation algorithm may define a
book or magazine object, with titles, genres, authors, themes, reading levels, and year of publication. In this guide we will give our custom object the name
book{ "schema": { "user": {}, "book": {}, } }
4. Interactions
A structure within the schema. Interactions describe the actions and sentiments that happen between the user and different objects of your schema.
{
	"schema": {
		"user": {},
		"book": {},
		"interactions": {},
		}
}
You can have as many keys and objects as you need, but each must be unique to avoid collisions.
Let’s build a user object!
With our basic structure outlined, let’s add some attributes to the user object.
- Labels: If your objective is to classify data into various labels, mention all of them in an array.
Here we aim to classify user object as
fake or not_fake{ "schema": { "user": { "labels" : ["fake", "not_fake"], }, "book": {}, "interactions": {}, }, }
- Attributes: Select attributes for the user. Example:
date_of_birth - Set a type, which can be any of the following
numbercategorylat_lng_locationdateboolean- Select other relevant information. Example:
min_dateandmap_to
{
	"schema": {
		"user": {
			"labels" : ["fake", "not_fake"],
			"date_of_birth": {},
		},
		"book": {},
		"interactions": {},
		},
}
Here we add type as a
date since we are dealing with the date of birth{ "schema": { "user": { "labels" : ["fake", "not_fake"], "date_of_birth": { "type": "date", }, }, "book": {}, "interactions": {} }
{
  "schema": {
    "user": {
      "labels" : ["fake", "not_fake"],
      "date_of_birth": {
        "type": "date",
				"min_date": "1960-01-01",
				"map_to": "user_date_of_birth"
      }
		},
		"book": {},
		"interactions": {}
}
You can read more about object Toggle Attributes with the link below
Onto the Book object
- Our
bookobject exists at the same level as the user. We have added theBook-Titleattribute to it with the type"number",
{
  "schema": {
    "user": {
      "labels" : ["fake", "not_fake"],
      "date_of_birth": {
        "type": "date",
				"min_date": "1960-01-01",
				"map_to": "user_date_of_birth"
      },
		},
		"book": {
				"Book-Title":{
          "type":"number"
        },
			},
		"interactions": {}
}
Interactions
There are important rules to follow when building interactions:
- They must be on the same level as the
userobject.
- They must contain at least one element inside of it that contains the structure
_with_*(For example_with_user,_with_recipe,_with_article, etc.).
{
  "schema": {
    "user": {
      "labels" : ["fake", "not_fake"],
      "date_of_birth": {
        "type": "date",
				"min_date": "1960-01-01",
				"map_to": "user_date_of_birth"
      }
		},
		"book": {
				"Book-Title":{
          "type":"number"
        },
			},
		"interactions": {
				"_with_book": {},
			}
}
HEADS UP: You can include as many
_with_* objects as you need, provided they’re defined in the schema as a high-level object (for example, _with_user).Interactions can have just their name or attributes:
{
  "schema": {
    "user": {
      "labels" : ["fake", "not_fake"],
      "date_of_birth": {
        "type": "date",
				"min_date": "1960-01-01",
				"map_to": "user_date_of_birth"
      },
		},
		"book": {
				"Book-Title":{
          "type":"number"
        },
			},
		"interactions": {
				"_with_book": {
					"like": {
	          "how_much": {
							"type": "number"
						},
		        },
					},
				"dislike": {}
			},
}
Final result
Below is an example of a complete interaction object schema:
{
  "schema": {
    "user": {
      "labels" : ["fake", "not_fake"],
      "date_of_birth": {
        ...
      },
      "joining_date": {
        ...
      },
			"instructions": [{
          ...
      }]
    },
    "book": {
      "Book-Title":{
          "type":"number"
        },
      }
    },
    "interactions": {
      "_with_book": {
        "like": {
          "how_much": {
						"type": "number"
					}
        },
				"dislike": {}
      },
      "_with_user": {
        "followed": {},
        "report": {}
      }
    }
  }
}
Next Step
Create a ProjectData processingFurther Readings
Check out to enhance and improve your machine learning performance